Note that installation process requires internet connection.
--- ### RequirementsTo be added
--- ### Download You can download LATRAS by going to [www.helioninteractive.com](https://www.helioninteractive.com), navigating to the **Download** page, or just follow this [link](https://www.helioninteractive.com/download/ "Donwloads page"). There you can find the latest release of the simulator. Click the download button, and the download should start automatically. The download can take up to a few minutes to finish, depending on your internet connection.If the download freezes or fails multiple times, try using a different browser.
#### [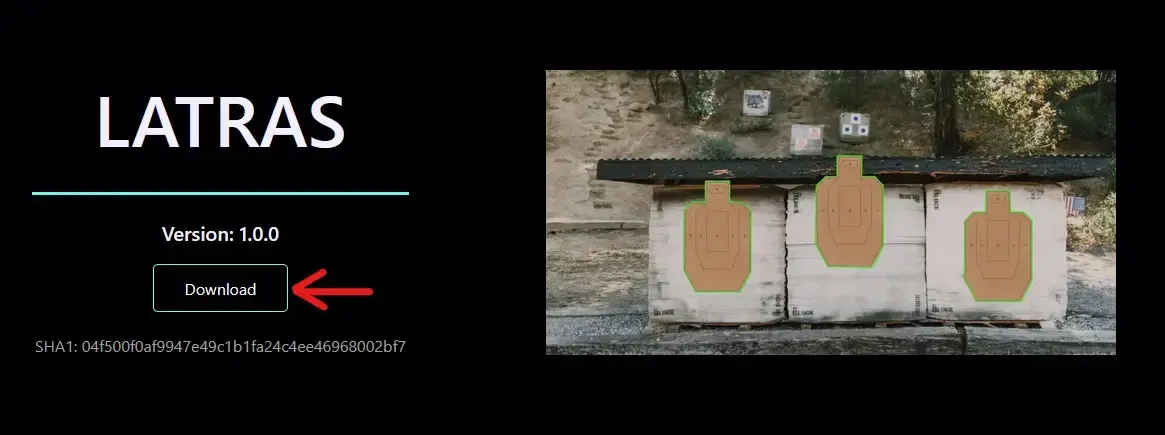](https://docs.helioninteractive.com/uploads/images/gallery/2025-07/download.webp)Individual components By scrolling on the download page, you will find Individual component section. Here are individual parts of the software. This should be used only for **troubleshooting** or special installations. --- ### Installation When the download is complete, open file explorer, navigate to Downloads folder where you will find **LatrasSetup\_v{version}.zip.** Move the .zip file to any folder in your computer (e.g. Temp). Extract the zip file. Inside you will find **LatrasSetup.exe.** Open the .exe file. Windows will display warning about unknown publisher. You can ignore it and proceed with the installation. [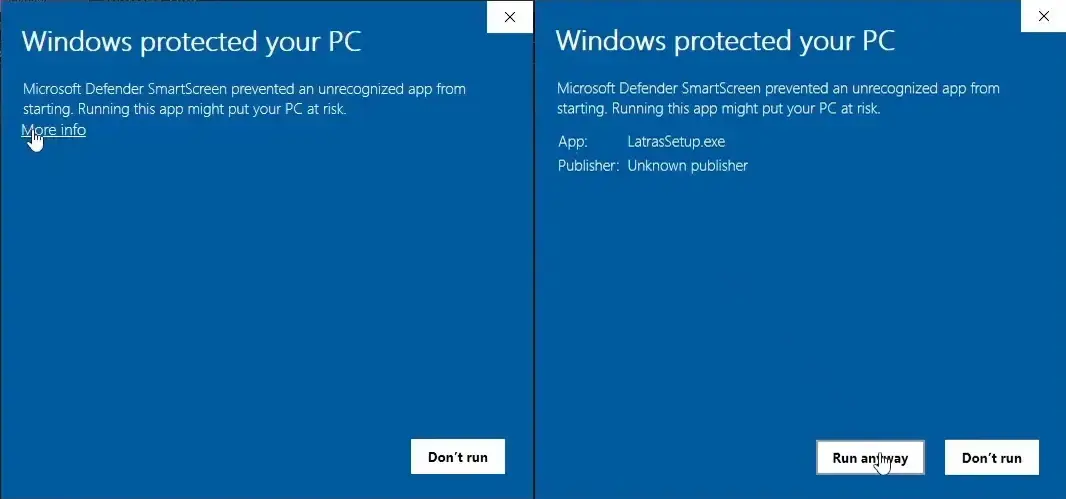](https://docs.helioninteractive.com/uploads/images/gallery/2025-07/windowsprotection.webp) Now the installer will open. Start by accepting the license agreement. You will need to choose the installation path. Default location is in the **Program Files**. This is also the recommended option, but you can choose any folder you like. After this step, there is an option to **Create Desktop Shortcut.**If you want to create desktop shortcut, you will need to run the installation on an windows account with administrative privileges. Otherwise the desktop shortcut needs to be created manually.
After this step the actual installation will begin. Wait for message saying **"Installation completed successfully"**. In the end **restart the computer** before starting LATRAS for the first time.| Go to [**Next page**](https://docs.helioninteractive.com/books/getting-started/page/first-start "Connecting to LATRAS Hub") |
After installation, make sure your computer runs through restart prior to first start.
##### First Start Double click on the **Latras.exe** file. Once loaded, message about missing licence appears. Click Close and then go to folder My account which is located in the upper left corner of the application. [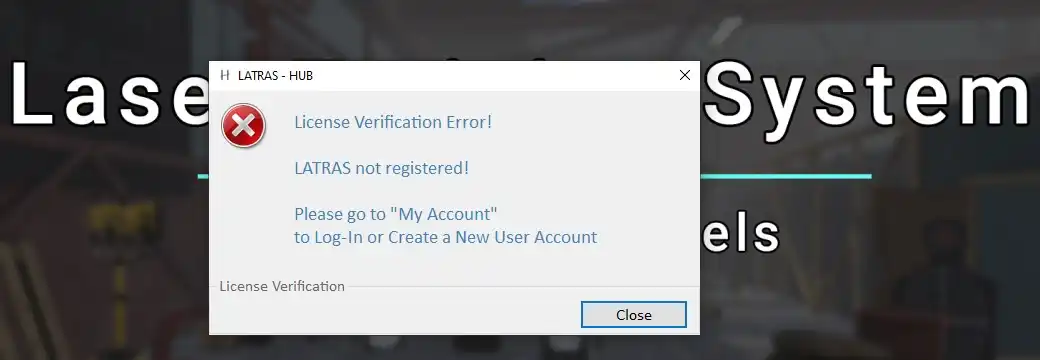](https://docs.helioninteractive.com/uploads/images/gallery/2025-11/latras-missinglicence1.webp) Click close and continue to My account (located in the upper left corner of the screen). [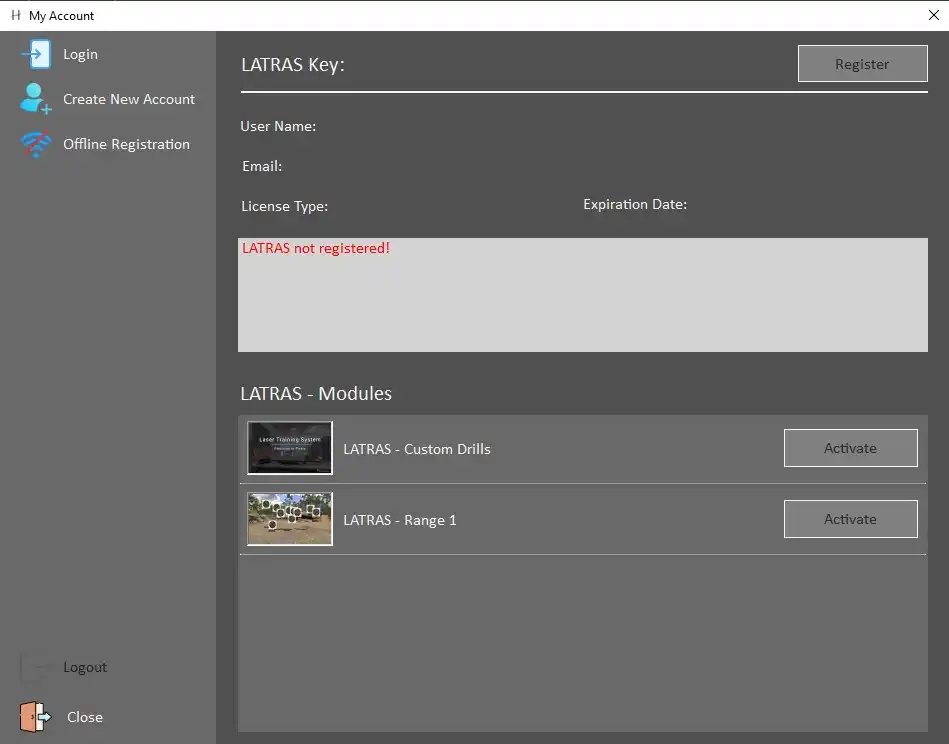](https://docs.helioninteractive.com/uploads/images/gallery/2025-11/latras-myaccount.webp) Available options are: **Login** - to be used for existing Helion Interactive account. **Create New Account** - in case no account has been set up yet. Required information is UserName, email, and a password. After filling in the information, proceed with Create Account button. An automated verification email with a unique code will be sent to your email address. Enter the code and click Verify.In case you haven't received the email within a few minutes, try Send New Code button. If the code doesn't come, or troubles with the verification persist, email to [info@helioninteractive](mailto:info@helioninteractive) for help.
After sucessfull verification, leave the My account window to see the main page Latras Hub. It is now possible to download the Range 1 plug-in. Click the Plug-in button. [](https://docs.helioninteractive.com/uploads/images/gallery/2025-11/latras-plugin.webp) In the newly opened dialog, click Install. [](https://docs.helioninteractive.com/uploads/images/gallery/2025-11/latras-install.webp) Then select Install Module. It will automatically download and install the latest version of Range 1. [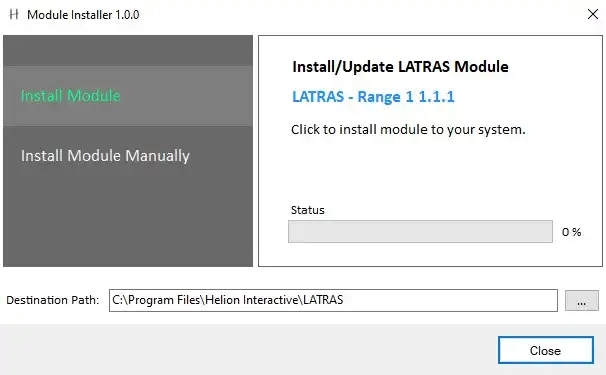](https://docs.helioninteractive.com/uploads/images/gallery/2025-11/latras-instalmodule.webp)Install Module Manually is suited for locating an existing installation or troubleshooting.
After its installation, Range 1 is available in Demo mode. For full use, the licence must be activated in My Account folder. [](https://docs.helioninteractive.com/uploads/images/gallery/2025-11/latras-demo.webp) For full activation of the Range 1 module, go to the main page and select My Account. ##### Licence Activation Select **Acivate,** enter your Product Key and Verify it. If sucessfully verified, Range 1 can be switched from Demo to full active mode by the Activate button. Last step is to restart LATRAS.| Go to [**Next page**](https://docs.helioninteractive.com/books/getting-started/page/license-activation "Connecting to LATRAS Hub") |
| Go to [**Next page**](https://docs.helioninteractive.com/books/getting-started/page/manual-module-installation "Connecting to LATRAS Hub") |
Manual module installation is not recommended as the default installation method. It should only be used for troubleshooting purposes or for installing experimental versions of our simulators.
### Prerequisites - Downloaded module installation package (ZIP file) ### Installation 1. Extract the module files to the directory where you want the application to be installed. 2. Open **LATRAS Hub** and click the **Plugins** button.[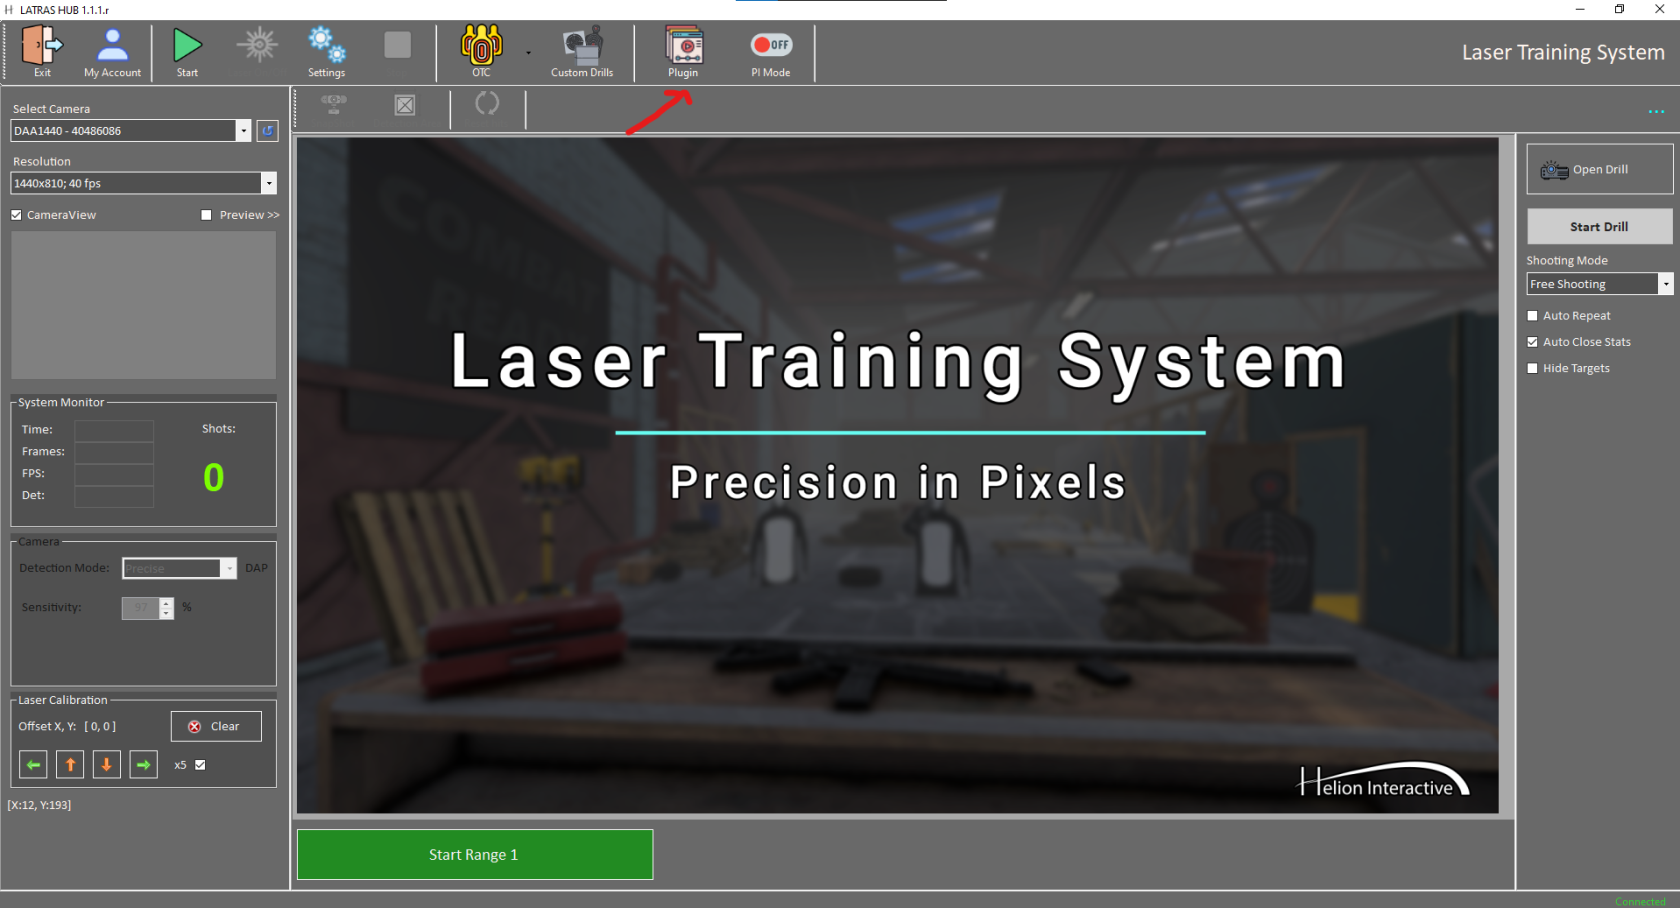](https://docs.helioninteractive.com/uploads/images/gallery/2026-05/image.png) 3. Select **Install** on the module you want to install. This will open a context window. In the context window, select **Install module manually**.[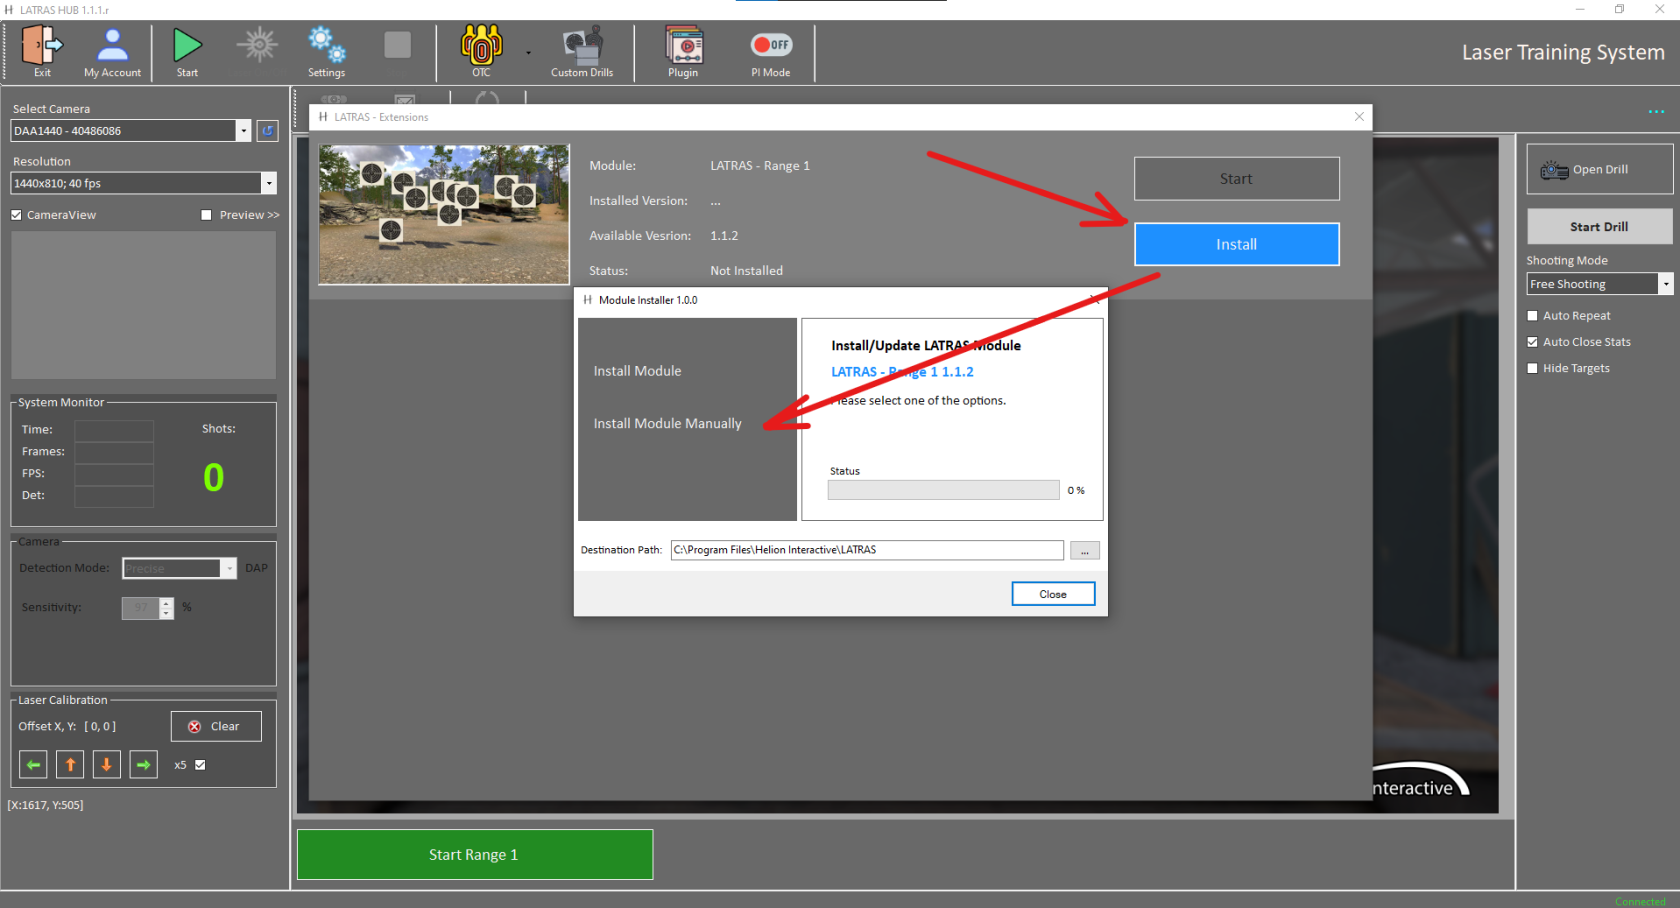](https://docs.helioninteractive.com/uploads/images/gallery/2026-05/OYximage.png) 4. Locate the directory where you extracted the files and select the executable file (for example, `Range1.exe`). [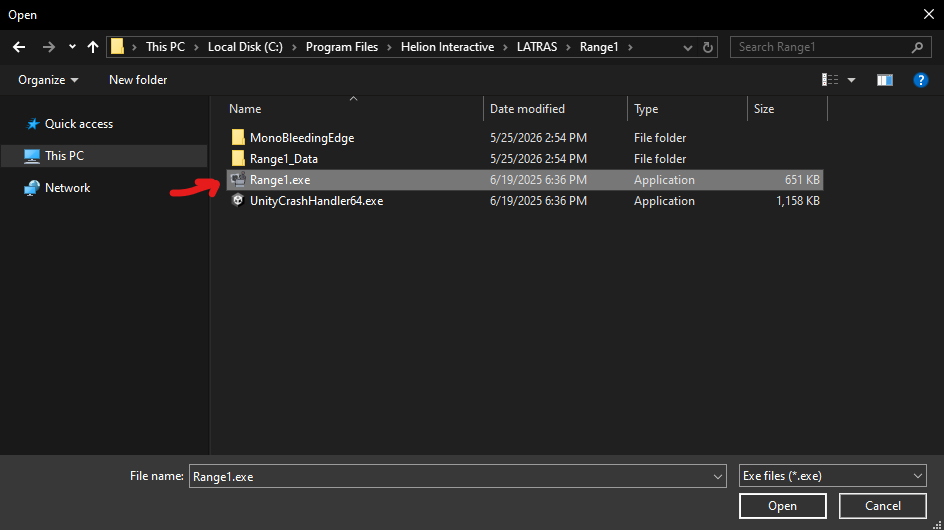](https://docs.helioninteractive.com/uploads/images/gallery/2026-05/UY1image.png) 5. After completing these steps, the module should be installed and ready to use.