Connecting to LATRAS Hub
Establishing Connection
Connect the camera to your computer / notebook, ideally using the Basler connector cable. Non branded cables will work too, but with speed limitations.
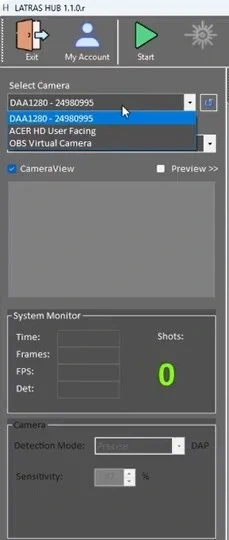
Start LATRAS Hub. In the upper left corner, check the Select camera scroll and look for camera starting DAA or D2A. Select this camera.
If the camera doesn't apear within the selection, click the small refresh button next to the scroll. If it still doesn't appear, check both cable connections - camera/cable/computer, or try restarting the LATRAS Hub.
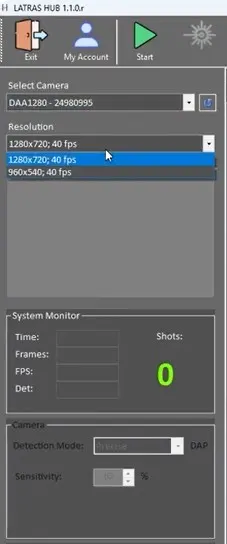
Follow with resolution selection. te best is to select camer's native resolution 1280x720 in order to get the highest number of pixels..
| Select Camera | Select Resolution |
|
|
|
|
|
Once the camera and resolution are selected, click the green Start button. |
|
|
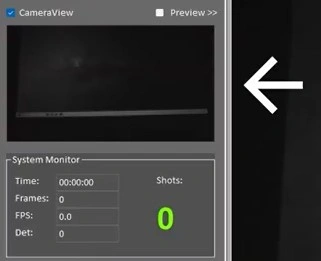
Camera feed will appear in the CameraView window just below the Resolution selection. |
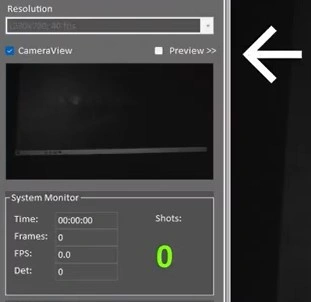 |
Should you want to see the feed in the main window, check the Preview box prior to hitting the Start button. |
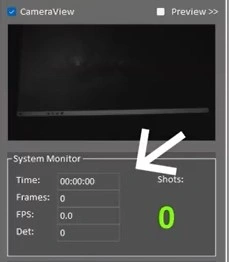 |
System Monitor updates every 10 seconds and keeps an eye on the important system functions and is especially useful for troubleshooting. Time FPS: Frames per second - indicates how many frames is the camera capturing per second. Det.: Displays the average time it takes the camera to caputure the laser detection.
If either of these parameters turn red, there may be a performance issue preventing the simulator in working correctly.
See next setting for hint. |
 |
Additional camera settings: Detection mode - Precise, Very Good, Good - Allows to lower the requirements on your computer system in one simple step. If everythig runs smoothly, leave "Precise" detection mode. Should you be getting red numbers in the System monitor while running, try resetting to to Very Good, if problems persist, try Good.
|