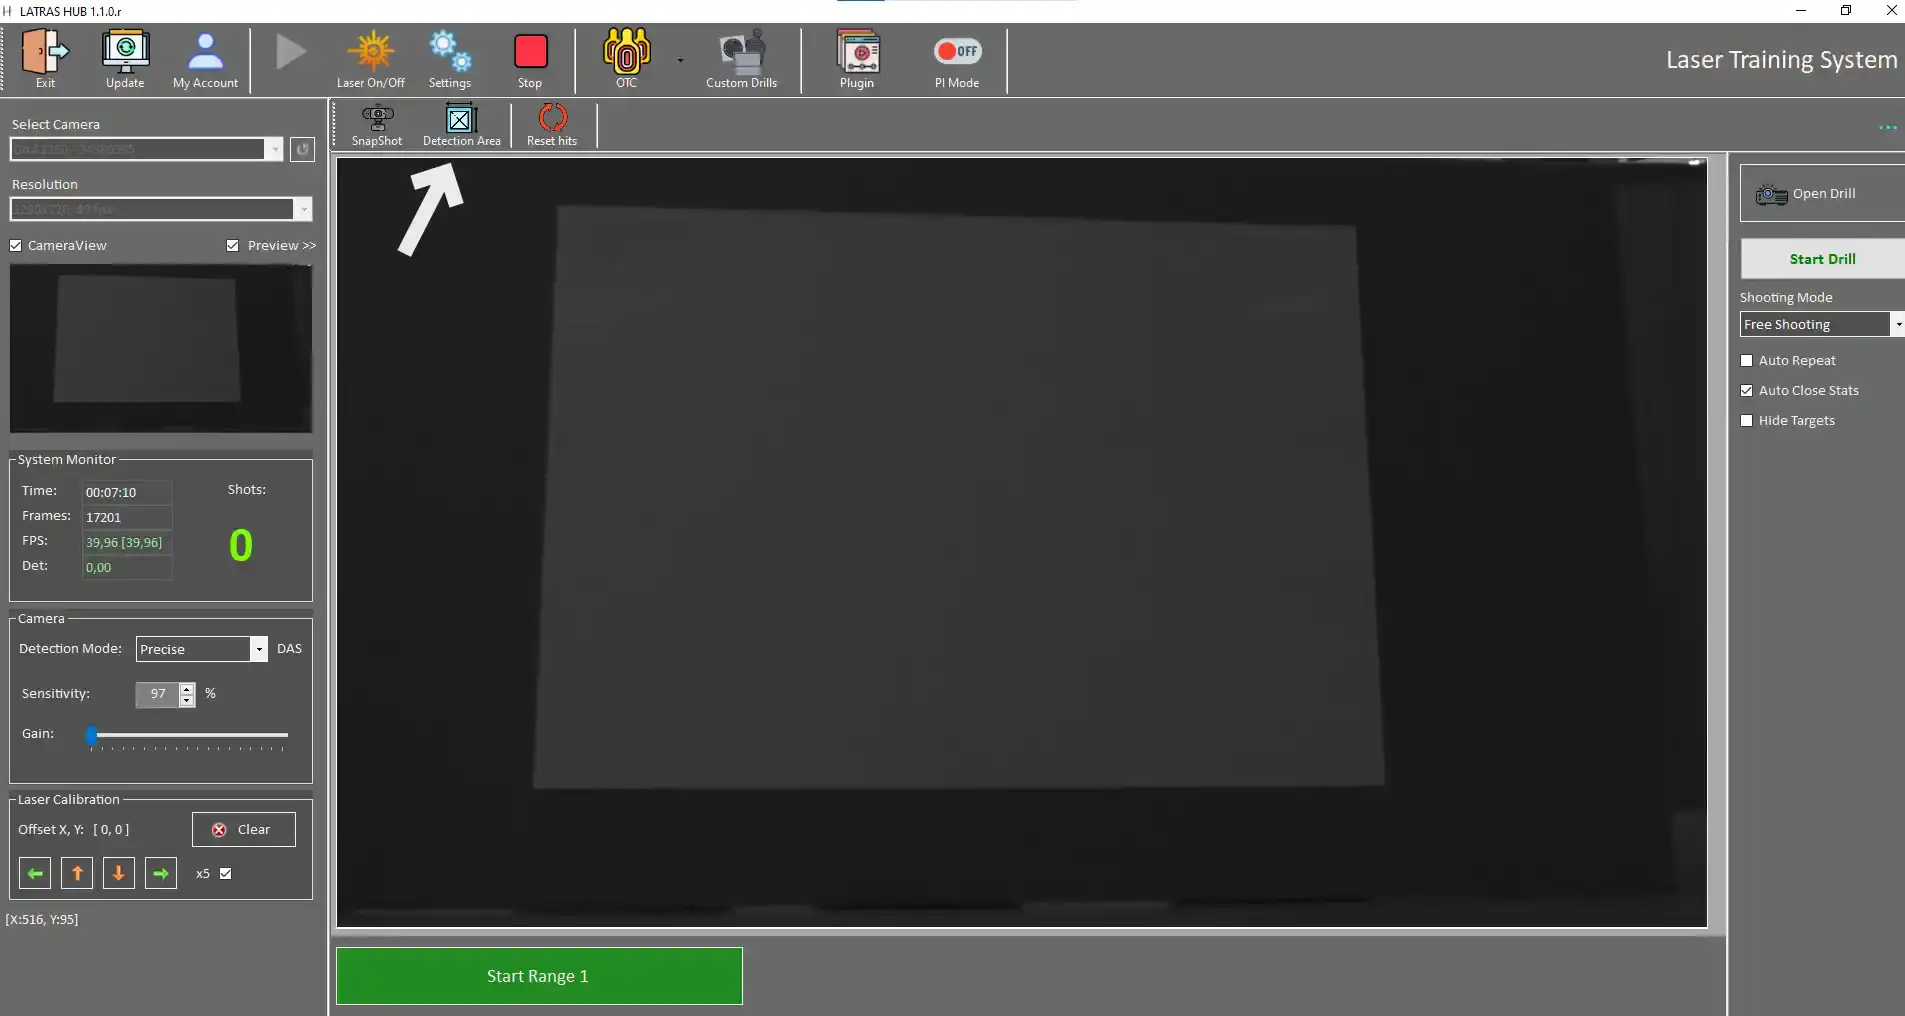
Selecting the Detection Area
Position the camera so that all corners of the projection are visible in the LATRAS Hub.
Make sure you have the Preview checkbox checked so the camera feed appears in the main window.
Some corners may appear too dim which is not a problem at this point.
Define the detection area - part of the screen where the laser will be tracked.
Click Detection area
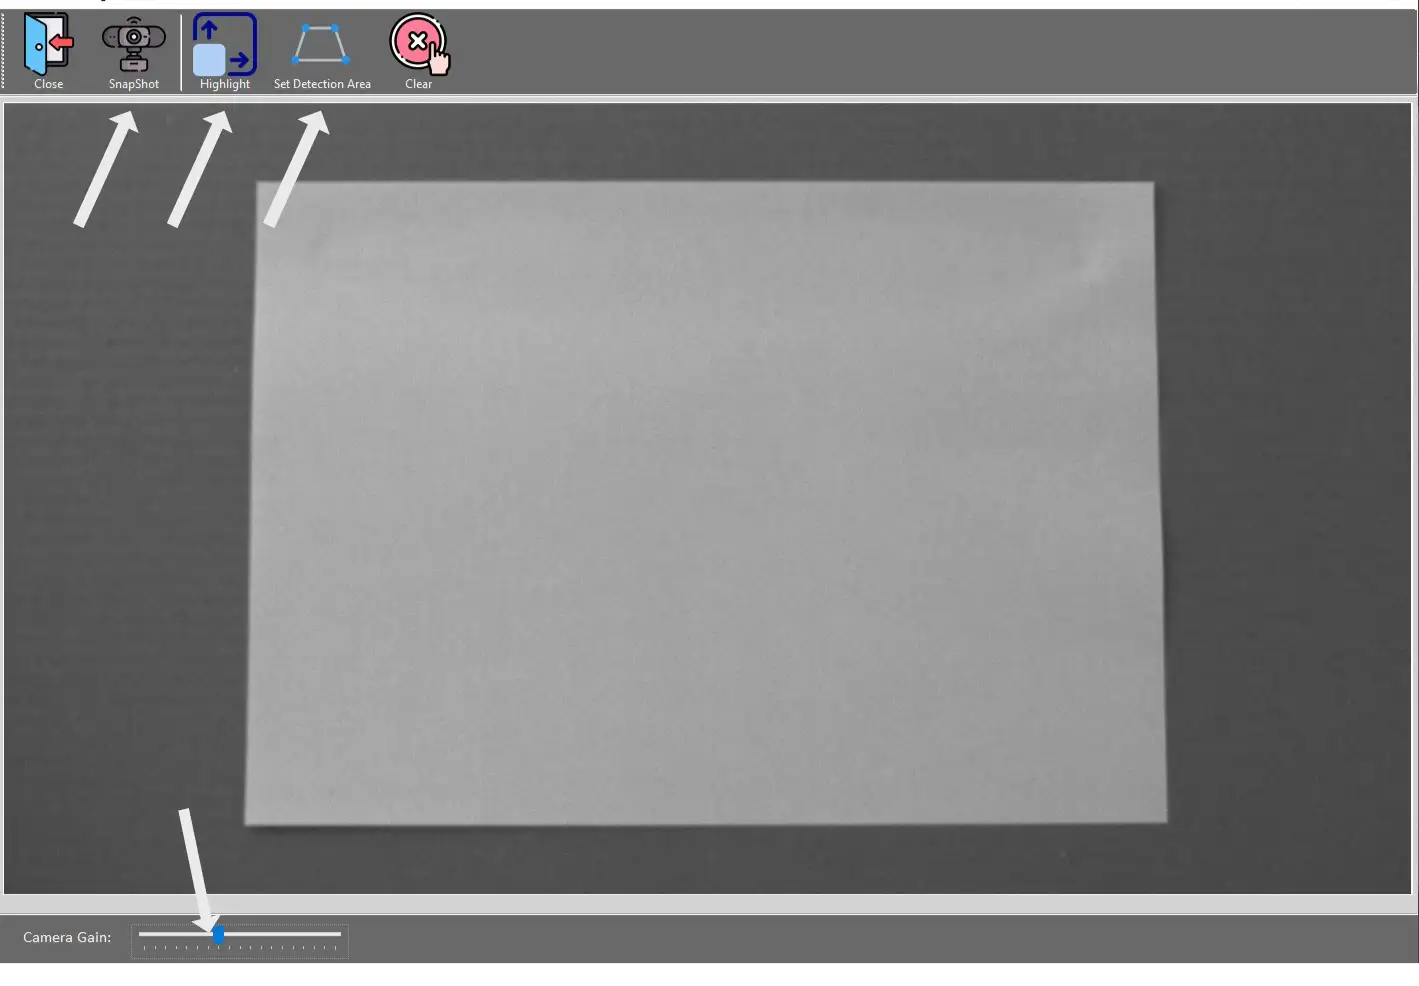
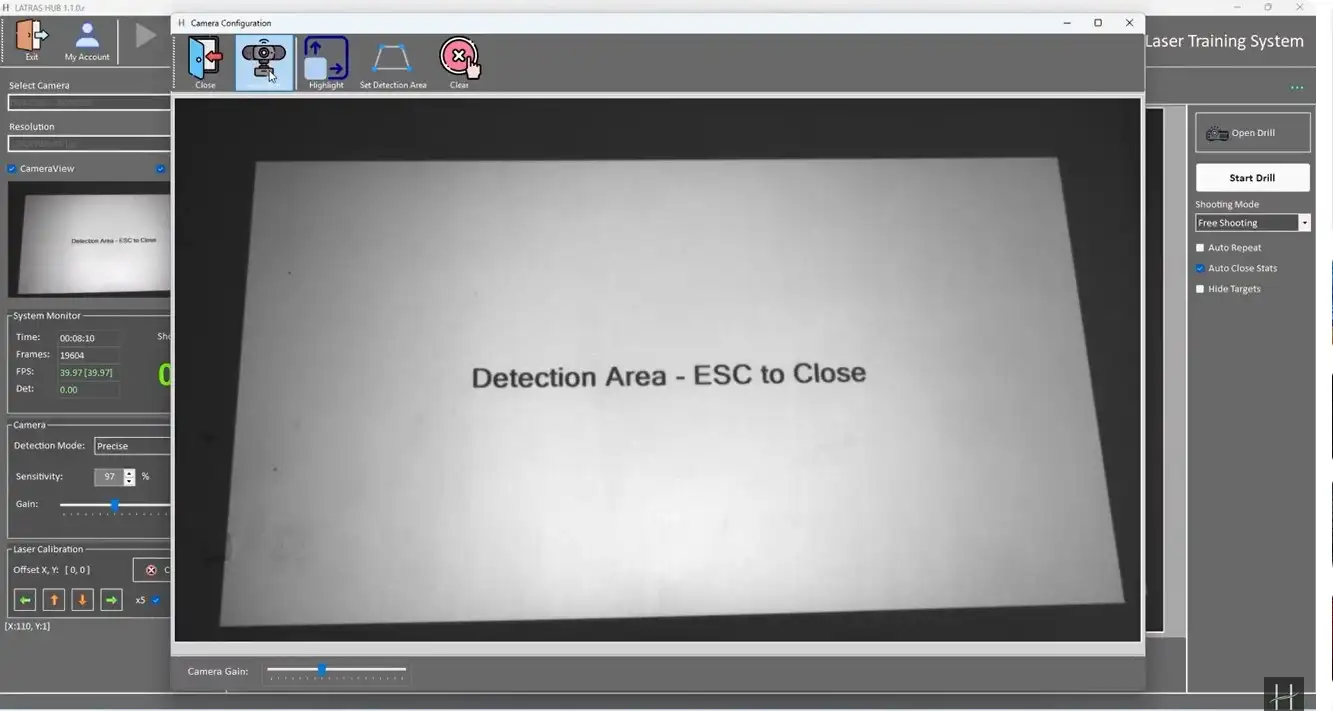
New window with following buttons appears:
Snapshot - captures current camera view.
Highlight - provides more contrast between the projection and the background.
Set Detection Area - defines the desired detection area by clicking its corners
Clear - deletes current detection area
Close - returns to the LATRAS Hub main window
When the projcted area is clearly visible,
hit Set Detection Area button and click at all four corners of the projection border.
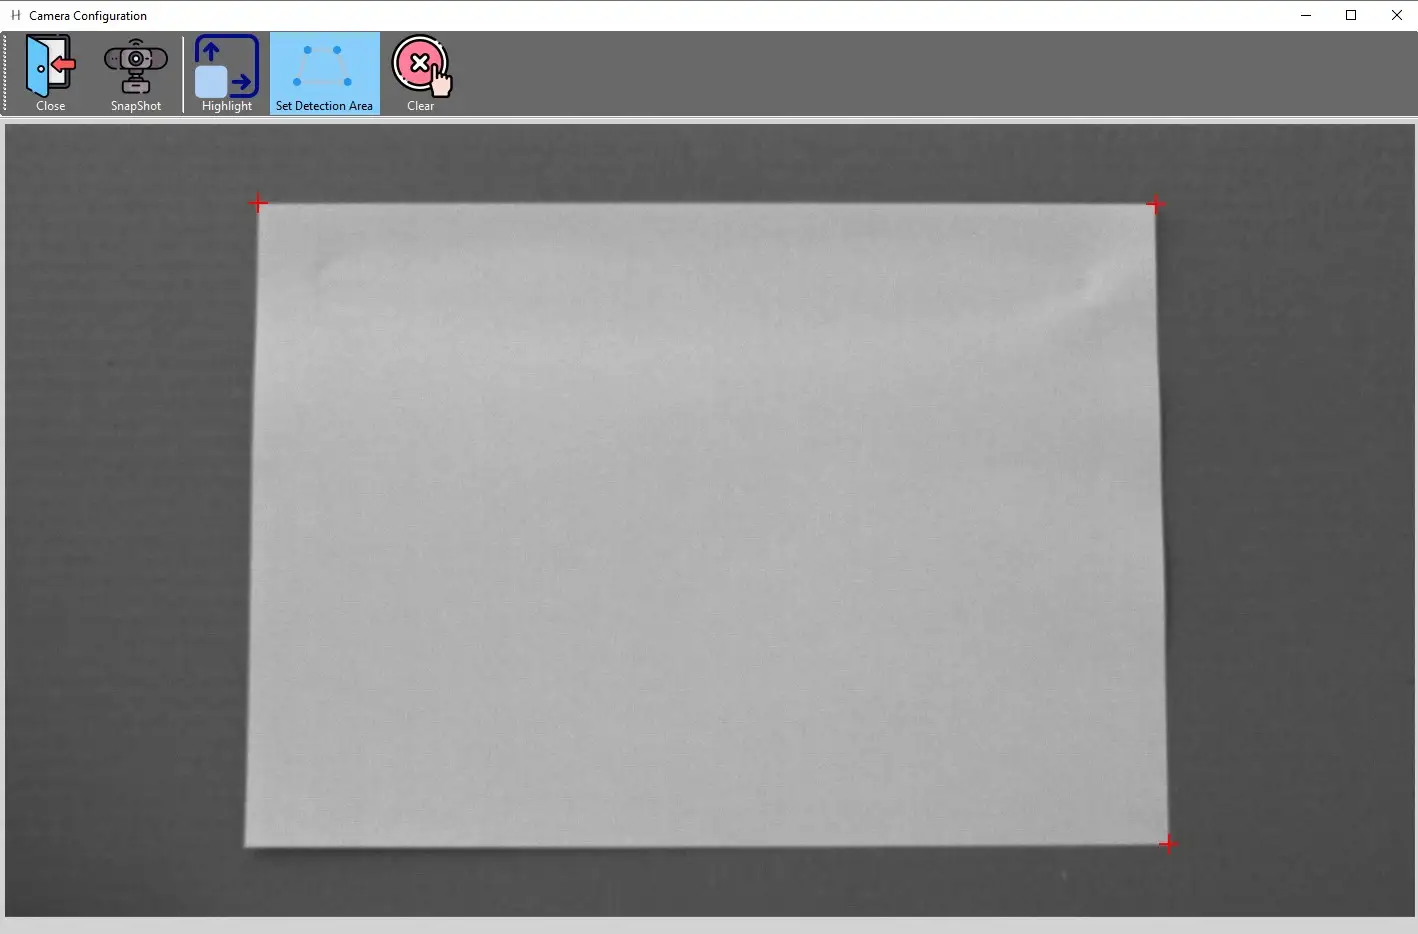
The rectangular detection area will automatically close after hitting the fourth corner and the background turns light blue.
When done, hit Close, go back to the main window, your detection area is set.
When the projected are isn't clearly visible
use the Highlight button. which will provide more contrast for easier detection area selection.
If the highlight appears on a different screen than the projecton is on, go back to the main page, to Settings, and change the Projection to a preferred setting.
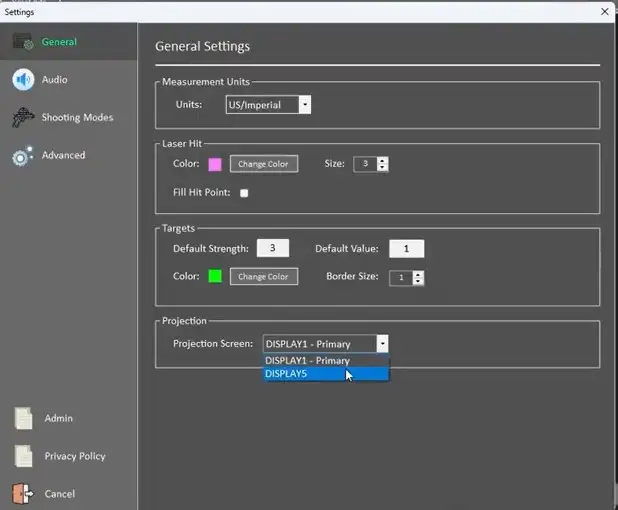
When the Projection Screen is correct, in your main LATRAS Hub window appears highlighted detection area:
Now, it is time to select the Set Detection Area and click at each of the corners of the highlighted projection.
Highlight -
to be continued..