Custom Targets
How to create a custom target
Select Background Image
- predefined image from C:\Program Files\Helion Interactive\LATRAS\Latras-HUB\Assets\Targets (or other location that has been selected while installing LATRAS Hub)
- any custom 16:9 image from any location on your computer
Only the image size of 16:9 (width:height) ratio is supported.
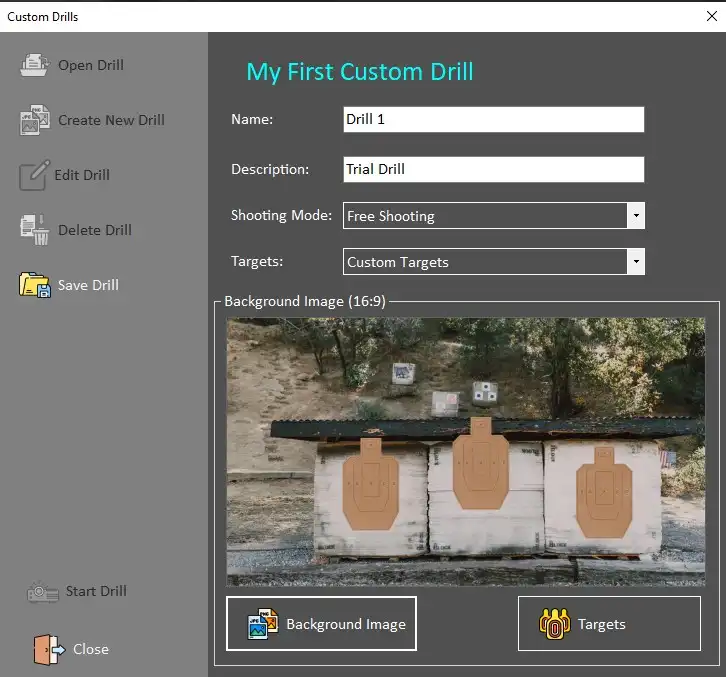
The selected image appears in the dialog window.
Follow with selecting target areas by clicking the Targets button.
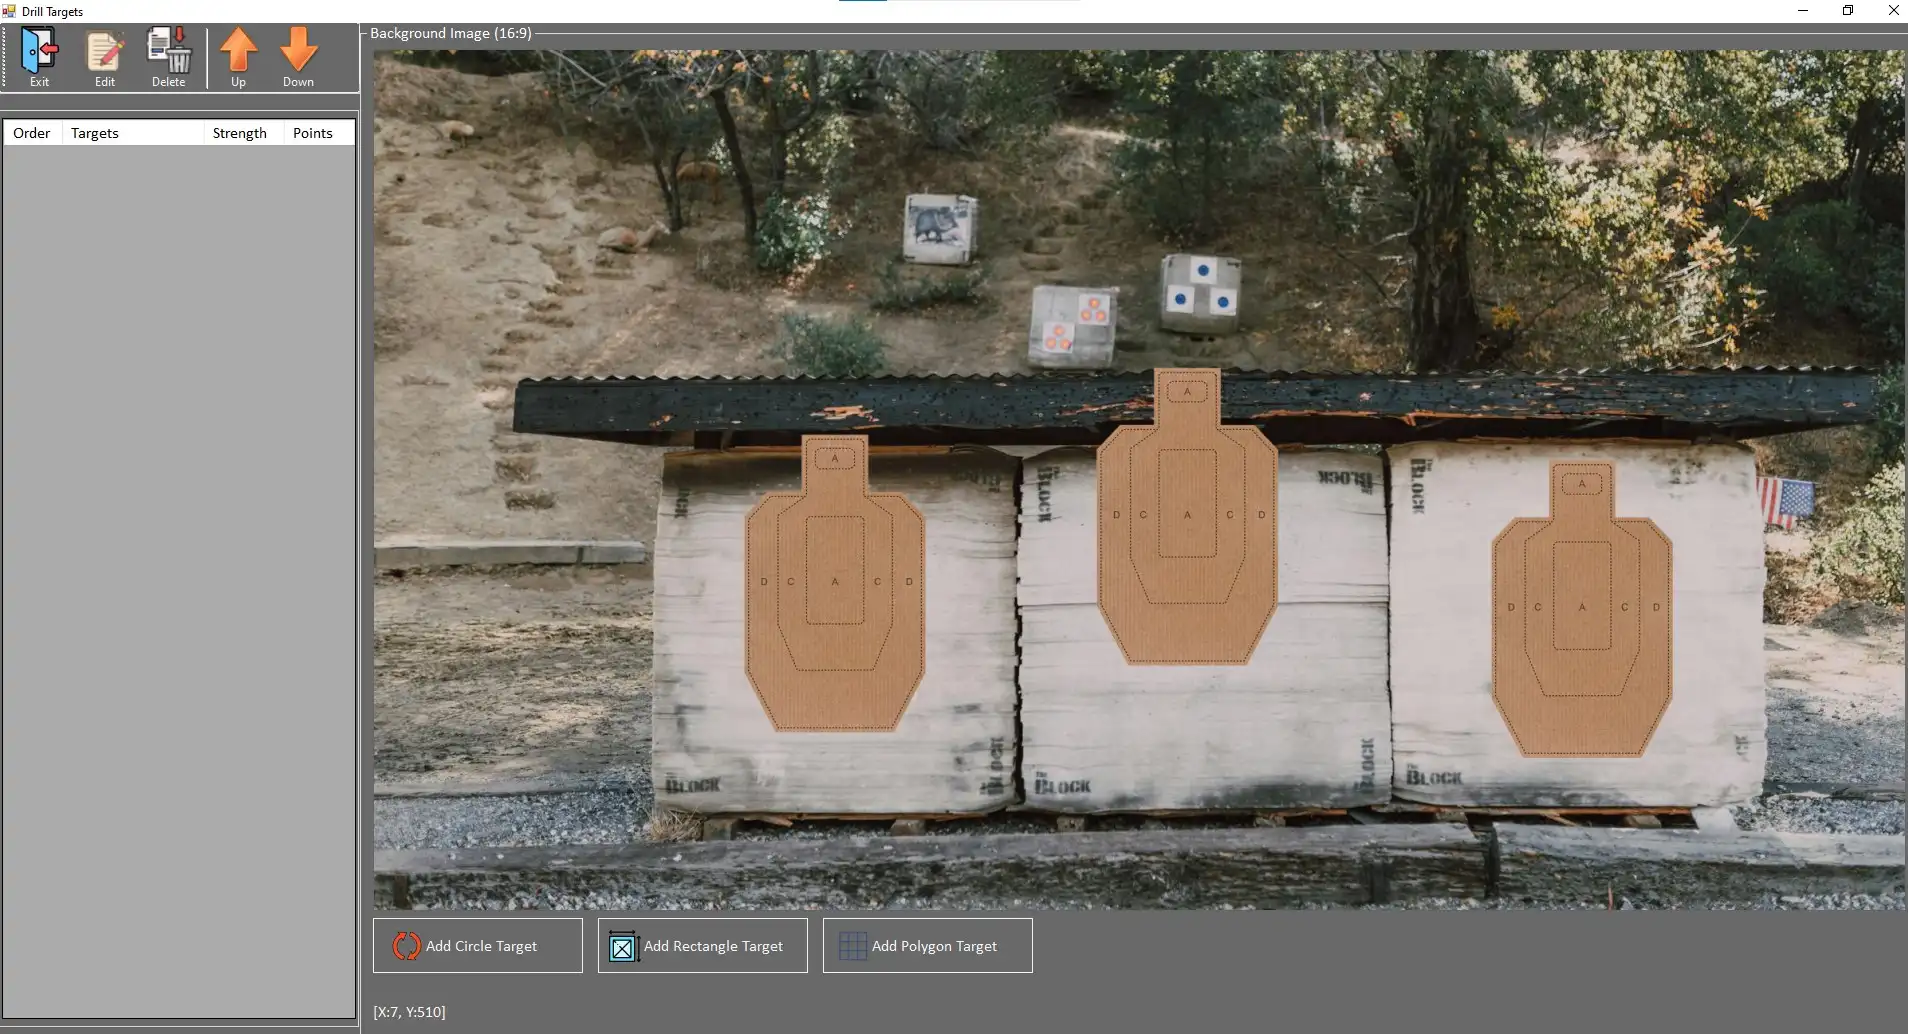
Create active Target areas using available tools:
Add Circle Target - select center of the circlular target are and then pull as far as desired with the mouse button pressed. Release the mouse button when the circle is the right size. To each created target area is an order number and Target C type assigned. Each target can be further modified (strength, value, sounds, etc.).
Add Rectangular Target - select one of the corners of the rectangular target area and drag the cursor across. Release the mouse button when the area is the right size. To each created target area is an order number and Target R type assigned. Each target can be further modified (strength, value, sounds, etc.).
Add Polygon Target - each mouse click creates one point of the polygonal target area. To close the area and to finalize the polygonal area use the right click. To each created target area is an order number and Target P type assigned. Each target can be further modified (strength, value, sounds, etc.).
When two target areas overlay, only one area will be recognized. For example, polygonal area C includes 2 areas A, when area A is hit, only the value of area A will be recognized and scored.
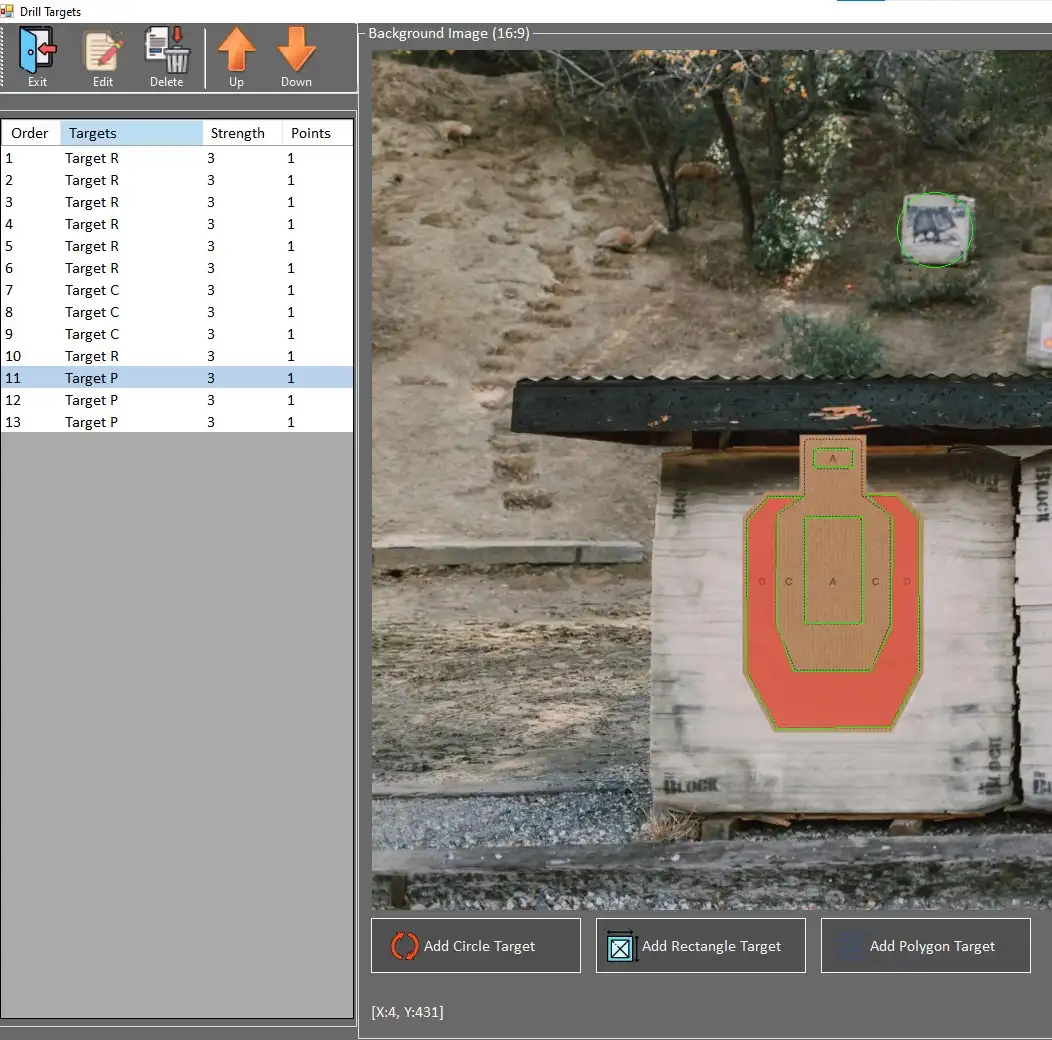
For further editing of the targets - select the target in the list - it gets highlighted. By clicking Edit, following options can be selected:
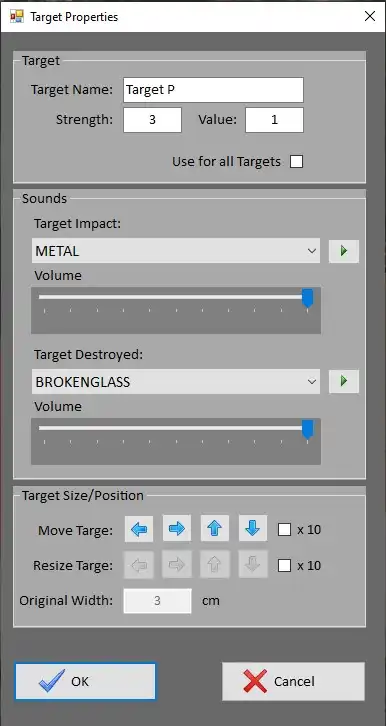 |
Custom name can be typed in. Strength - number of hits before elimination of the target Value - number of points awarded for selected target area
Use for all targets - sets this Strength and Value for all targets defined in this drill |
|
Target Impact - sound of the impact when the area is hit
Volume - position the slider as desired, max is on the right |
|
|
Target Destroyed - sound of the last impact when the target is destroyed (Strength= 3 --> 3rd hit)
Volume - position the slider as desired, max is on the right |
|
|
Target Size/Position
Move Target - for more precise positioning - arrows move selected target in either direction in small increments (or 10x bigger when the checkbox is selected)
Resize Target - scales target in small increments, available for rectangular and circular areas only
Original width applies only to Presicion Targets' mode. |
To remove target, select it in the list of targets and click Delete.
When all desired target areas are set, return to main page by clicking Exit.
Proceed with Save Drill.
Start the drill by clicking Start Drill.
The drill is prompted to the main screen and the projector. Further control over the drill is located in the right hand side of the main page of LATRAS Hub.
No comments to display
No comments to display